
1. 우분투에 ssh/openssh-server설치
$ sudo apt-get install ssh
$ sudo apt-get install openssh-server
2. PuTTY 다운로드
https://www.chiark.greenend.org.uk/~sgtatham/putty/latest.html
Download PuTTY: latest release (0.76)
This page contains download links for the latest released version of PuTTY. Currently this is 0.76, released on 2021-07-17. When new releases come out, this page will update to contain the latest, so this is a good page to bookmark or link to. Alternativel
www.chiark.greenend.org.uk
3. puttygen.exe로 public/private key 생성
1) Generate 버튼 클릭
2) Public key for pasting into OpenSSH authorized_keys file의 내용 복사해두거나 저장
3) Save private key 버튼 눌러 개인키 저장
4) 우분투 서버의 authorized_keys에 공개키 등록
vi ~/.ssh/authroized_keys| 1_ i키 눌러서 입력모드로 변경 2_ Public key for pasting into OpenSSH authorized_keys file의 내용 붙여넣기 3_ ESC키 눌러서 명령모드로 변경 4_ :wq 눌러서 저장 후 나가기 |
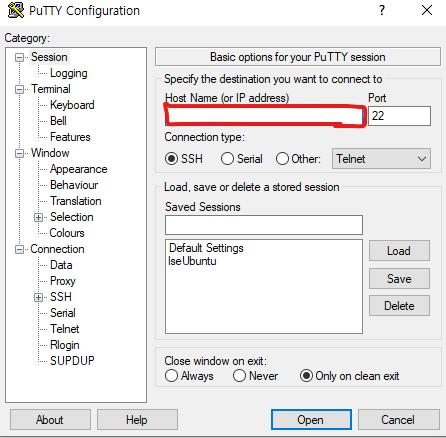
4. PuTTY 접속
1) IP주소 입력 (Session)
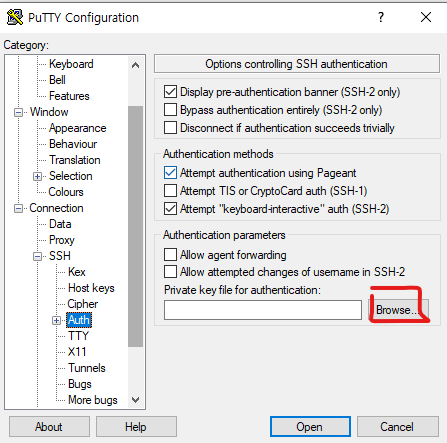
2) 저장한 개인키 등록 (Connection > SSH > Auth)
3) Open 버튼 눌러서 접속
* Session에 Saved Sessions를 이용하면 다음 번 실행 시 Load를 통해 설정을 불러올 수 있다.
5. 완료
1) 접속 계정 입력
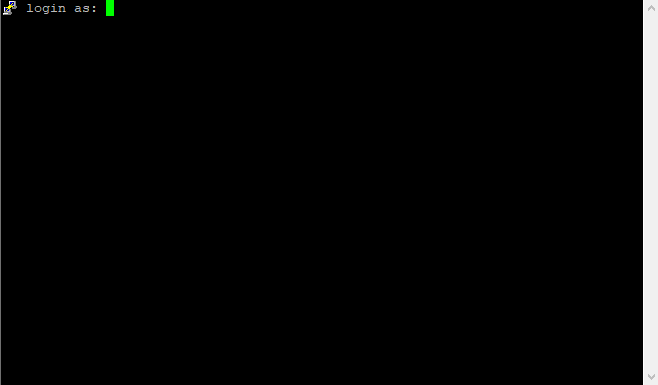
2) 계정 비밀번호 입력

3) 접속 성공

'Ubuntu' 카테고리의 다른 글
| Ubuntu(우분투)에서 MySQL설치_tar파일 (0) | 2021.11.05 |
|---|---|
| Ubuntu(우분투)에서 tar/tar.gz 압축하기 및 압축풀기 (0) | 2021.11.04 |
| Window(윈도우)에서 Ubuntu(우분투) 서버로 파일 전송 (0) | 2021.11.04 |